Positioning Outdoor Solar Motion Sensor Lights: Blindspot Layout Guide
Mount solar motion-sensor wall lights 6.5 to 8.0 feet (2.0 to 2.4 meters) above ground level, tilted 15 to 30 degrees downward. Ensure the poly-silicon solar panel receives 6 to 8 hours of unshaded daily sunlight. Space adjacent fixtures 12 to 16 feet apart so their 19-foot, 120-degree Passive Infrared (PIR) motion detection zones overlap, eliminating dark perimeter blindspots.
Essential Blindspot Elimination Rules
- Optimal Mounting Height: 6.5 ft to 8.0 ft off the ground ensures the 19FT PIR sensor sweeps human targets without overshooting or creating ground dead zones.
- 120° Arc Overlap Spacing: Space units 12 ft to 16 ft apart to maintain continuous motion detection along exterior walls.
- 6–8 Hour Sunlight Clearance: Position top poly-silicon panels at least 4 to 6 inches below deep roof eaves to capture direct daily daylight.
- Lateral Path Orientation: Place sensors perpendicular to walking traffic; PIR motion sensors detect side-to-side cross-movement 40% faster than head-on approaches.
- Battery Reserve Management: Use Mode 1 (Motion Sensor Mode) to conserve the 3.7V 2200mAh battery for 8 to 10 hours of full illumination.
Technical Placement Specifications & Detection Parameters

Photo by Jimmy Liao on Pexels
| Parameter | Optimal Spec | Tolerance Limit | Impact of Incorrect Setting |
| --- | --- | --- | --- |
| Mounting Height | 6.5 ft – 8.0 ft (2.0 m – 2.4 m) | 5.5 ft – 9.0 ft | >8.0 ft overshoots targets; <6.5 ft restricts induction radius below 12 ft. |
| PIR Detection Distance | 19 feet (5.8 meters) | 12 ft – 19 ft | Obstructed view or extreme ambient temperatures reduced sweep reach. |
| PIR Sensing Angle | 120 degrees horizontal | 110° – 120° | Narrow angles create 4 to 6 ft dead zones between spaced wall units. |
| Daily Sun Exposure | 6 – 8 hours direct rays | Minimum 5 hours | <6 hours drops 3.7V 2200mAh battery charge, cutting nightly runtime below 8 hours. |
| Fixture Inter-Spacing | 12 ft – 16 ft | 10 ft – 18 ft | >16 ft leaves unlit dark gaps; <10 ft triggers adjacent light dusk sensor shutoff. |
| Downward Tilt Angle | 15° – 30° downward | 10° – 45° | 0° (flat) creates a 3.5 ft blindspot directly beneath the wall mount. |
Reference parameters for calibrating PIR induction ranges and solar charging efficiency across outdoor wall installations:
Visualizing Detection Arcs and Daylight Coverage
Refer to the following technical blueprints when plotting fixture layouts along residential perimeters:
Pre-Installation Blindspot Audit Checklist
- Measure ground-to-fixture height to confirm position is between 6.5 ft and 8.0 ft.
- Check top clearance: Ensure the poly-silicon solar panel sits at least 4–6 inches lower than roof eaves or gutters.
- Perform daylight trace: Verify the location receives 6 to 8 hours of direct, unshaded sunlight daily.
- Check path geometry: Position the PIR sensor so walking traffic crosses laterally across its 120-degree field.
- Space adjacent fixtures 12 to 16 feet apart along continuous walls to permit overlapping 19FT motion arcs.
- Keep fixtures at least 5 feet away from exterior glass windows or heavy reflection sources that interfere with heat sensors.
- Verify the IP65 waterproof casing seal is clear of dirt or paint overruns prior to final mounting.
Pro Tip: The 45-Degree Eave Clearance Rule
Deep roof eaves, soffits, and gutters cast long shadows that reduce daily solar panel intake by up to 60%. Apply the 45-Degree Clearance Rule: measure the depth of your roof overhang (e.g., 12 inches), and mount the solar light at least that same distance (12 inches) down from the soffit line. This ensures the top-mounted poly-silicon solar panel receives direct sun rays during mid-day solar peak hours (10:00 AM to 2:00 PM), securing a full 6 to 8-hour charge to power the 3.7V 2200mAh battery through the night.
Implementation Action Plan
Your decision: Identify dark blindspots around garage corners, side pathways, and entryways requiring 19FT motion sensor protection.
Do this next: Conduct a 2-minute solar path inspection between 11:00 AM and 1:00 PM, mark mounting points at 7.0 ft height with 14 ft spacing, and select Mode 1 for high-security areas.
- Read next: How to Optimize Solar Wall Light Motion Sensor Sensitivity and Modes
- Read next: Step-by-Step Wireless Solar Wall Light Installation Guide
4-Pack Solar Powered Porch Lights featuring High-Efficiency Poly-silicon Solar Panels and 19FT Motion Sensors.
Follow these practical steps to execute your perimeter light layout:
Placement Decision Framework by Property Zone
Positioning must balance daily sun collection with thermal infrared motion detection. Adjust height and spacing based on wall type and pedestrian movement paths.
Best choice for
- Mount at 6.5 ft height with 14 ft staggered spacing along the wall — Captures lateral movement instantly within the 19FT reach without blinding pedestrians at eye level.
- Mount twin fixtures at 7.5 ft height on outer door pillars angled 20° inward — Provides 360-degree corner illumination and sweeps vehicles crossing the driveway threshold.
- Mount at 7.0 ft height directly on corner support posts beyond roof overhang shadows — Clears roof eaves for full 6–8 hr solar panel charging while illuminating patio stairs.
- Mounting directly under 2-foot roof eaves that cast full shadow during peak solar hours.
- Positioning sensors facing directly toward swaying tree branches or streetlights that trigger false alerts or blind dusk-to-dawn sensors.
- Corner Extension Brackets — Pushes the fixture 6 inches away from deep fascia boards to clear daily shading on the top solar panel.
Recommended Equipment for Complete Perimeter Security
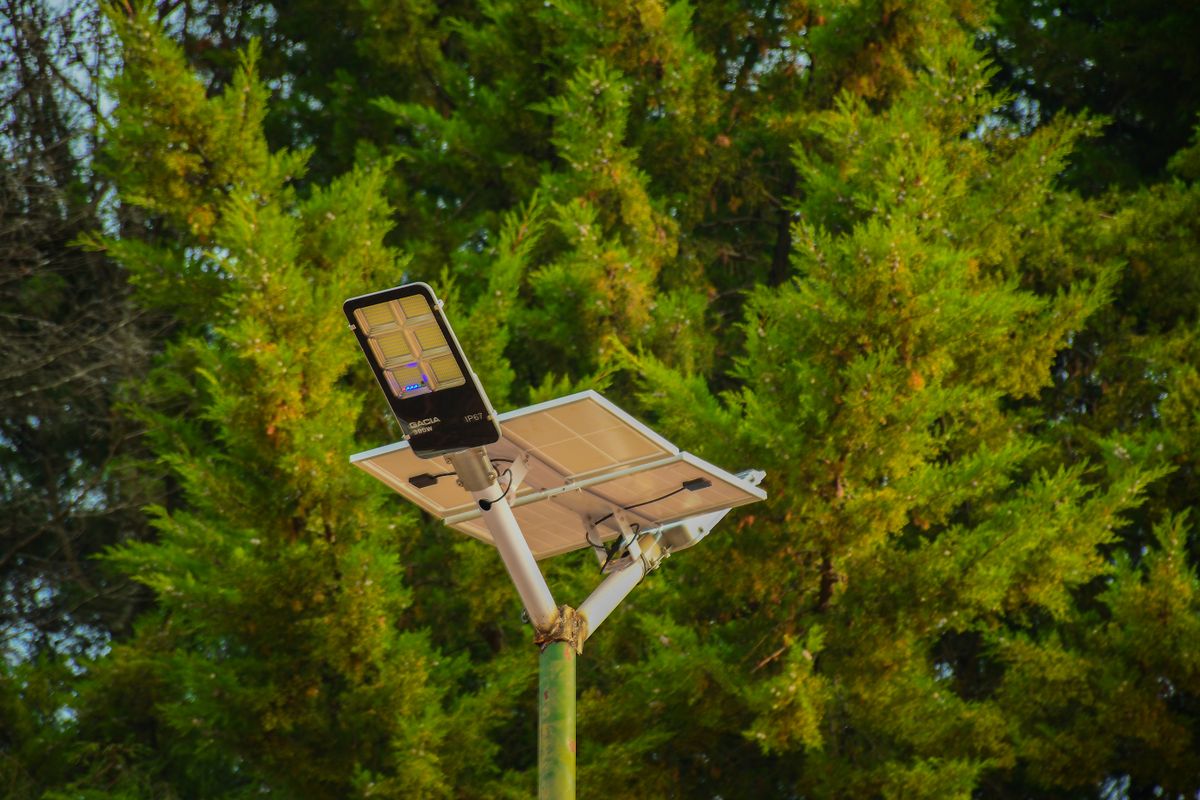
Photo by finix photographer on Pexels
Deploy a balanced 4-pack perimeter system engineered for wireless all-weather security:
To achieve total perimeter security without electrical wiring, solar outdoor wall lights rely on two independent physical systems: the top-mounted poly-silicon solar panel and the front-facing Passive Infrared (PIR) motion sensor. Maximizing performance requires optimizing both energy collection and detection geometry.
PIR Motion Detection Physics & 19FT Induction Reach
Passive Infrared sensors do not emit light or radio waves; they measure far-infrared thermal radiation emitted by moving bodies (humans, pets, vehicles). The sensor lens splits the 120-degree field of view into optical zones. When a thermal source moves across these zones, the sensor triggers 100% illumination.Key physical properties dictate how PIR sensors respond:
Balancing Daily Poly-Silicon Solar Collection
Generating 8 to 10 hours of nightly illumination requires fully charging the internal 3.7V 2200mAh battery during daytime hours. High-efficiency poly-silicon solar panels require 6 to 8 hours of direct, unshaded sunlight to reach maximum capacity.- South and West Exposure: In the Northern Hemisphere, south-facing walls receive the most consistent direct solar irradiance, followed by west-facing walls. North-facing walls receive ambient indirect light, which can extend necessary charge time beyond 10 hours.
- Roof Overhang Shading: A standard 12-inch roof eave casts a moving shadow that blocks up to 4 hours of midday direct sunlight if lights are mounted too high. Always maintain 4 to 6 inches of vertical clearance below overhangs.
- IP65 Weather Resilience: Heatproof and IP65-rated waterproof housings protect poly-silicon cells and PIR lenses from dust accumulation, rain intrusion, and thermal expansion. Cleaning the top panel lens twice a year maintains optical clarity and peak charging current.
Placement Scenarios: Correct vs. Incorrect Mounting Configurations
| Placement Scenario | Mounting Height | Sun Clearance | 19FT PIR Motion Performance | Risk / Outcome Assessment |
| --- | --- | --- | --- | --- |
| Garage Outer Pillars | 7.0 ft – 7.5 ft | Unshaded (Full Sun) | Sweeps vehicles & pedestrians 19 ft out | Optimal. Complete entry coverage with 6–8 hr full charge. |
| Deep Porch Under Eave | 8.5 ft | Shaded by soffit (>50% shadow) | Overshoots targets; misses approaching visitors | Poor. Battery starves; dead zones under porch roof. |
| Narrow Side Yard Pathway | 6.5 ft – 7.0 ft | Direct South/West Sun | Cross-traffic trips sensor instantly across 120° arc | Optimal. High security; battery maintains 8–10 hr runtime. |
| Low Fence Line Mounting | 4.5 ft | Unshaded | Restricts PIR range to <10 ft; blinds pedestrians | Suboptimal. Creates intense floor glare and short detection range. |
| Back Patio Door Wall | 7.0 ft | Unshaded (4-6 in. below gutter) | Full 120° coverage across patio stairs | Optimal. Ideal balance of security and ambient deck lighting. |
Evaluate mounting setups across primary residential exterior zones:
5 Critical Positioning Errors That Cause Blindspots and Dead Batteries
Avoid these common mistakes when positioning outdoor solar wall lights:
Deepen Your Outdoor Solar Security Setup
Explore additional technical layout and optimization guides for residential solar lighting:
- How to Optimize Solar Wall Light Motion Sensors: Sensitivity, Modes & 19FT Range Setup
- How to Install Wireless Solar Outdoor Wall Lights: A Step-by-Step DIY Guide
- Dusk-to-Dawn vs. Motion-Activated Solar Lights: Complete Security Comparison
- Troubleshooting Solar Motion Sensor Wall Lights: Fixing Range and Power Issues
Frequently Asked Questions About Solar Light Positioning
What is the ideal mounting height for solar motion sensor wall lights?
The ideal mounting height is 6.5 to 8.0 feet (2.0 to 2.4 meters) above ground level. Mounting within this range allows the 120-degree PIR sensor to sweep out to its maximum 19-foot induction radius while preventing ground blindspots directly beneath the fixture.
How do I prevent eaves or gutters from blocking my solar light's charging panel?
Follow the 45-degree clearance rule: mount fixtures at least 4 to 6 inches below deep roof overhangs or soffits. This prevents moving daytime shadows from cutting into the 6 to 8 hours of direct sunlight required to fully charge the internal 3.7V 2200mAh battery.
How do motion sensors perform through glass windows or shrubs?
Passive Infrared (PIR) sensors detect far-infrared heat radiation emitted by warm bodies. Far-infrared energy cannot pass through glass windows and is physically blocked by dense foliage, creating artificial blindspots. Always ensure an unobstructed line of sight between the lens and key walking paths.
Which lighting mode is best for perimeter home security?
Motion Sensor Mode (Mode 1) is recommended for perimeter security. It keeps the light off or ultra-dim until motion triggers 100% brightness for 15–20 seconds. This mode maximizes energy conservation, ensuring the 2200mAh battery maintains full power for 8 to 10 hours throughout the night.
Find solutions to common wall mounting, motion sensor arc, and solar panel charging questions:
Ready to Secure Your Home Perimeter?
Your decision: Upgrade your exterior lighting layout using a balanced 4-pack solar motion sensor wall light system.
Do this next: Order your 4-pack solar wall lights, audit your mounting locations at 6.5–8 ft height, and enjoy automatic dusk-to-dawn security without electric bills.
Related resource: Solar Outdoor Wall Lights Official Store (solaroutdoorwalllights.com)
4 Pack Solar Powered Porch Lights featuring High-Efficiency Poly-silicon Panels, 19FT PIR Motion Sensors, and IP65 Waterproofing.
Equipping your property with wireless solar wall lighting takes only minutes. Explore our high-efficiency 4-pack solar outdoor wall lights to secure your pathways, garage, and yard effortlessly.
Cover photo by quang vinh on Pexels.